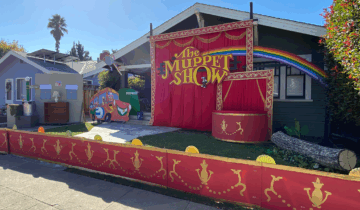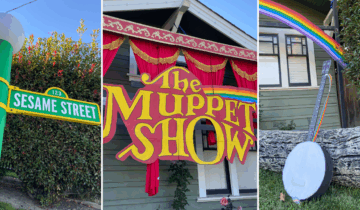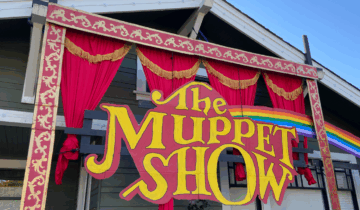


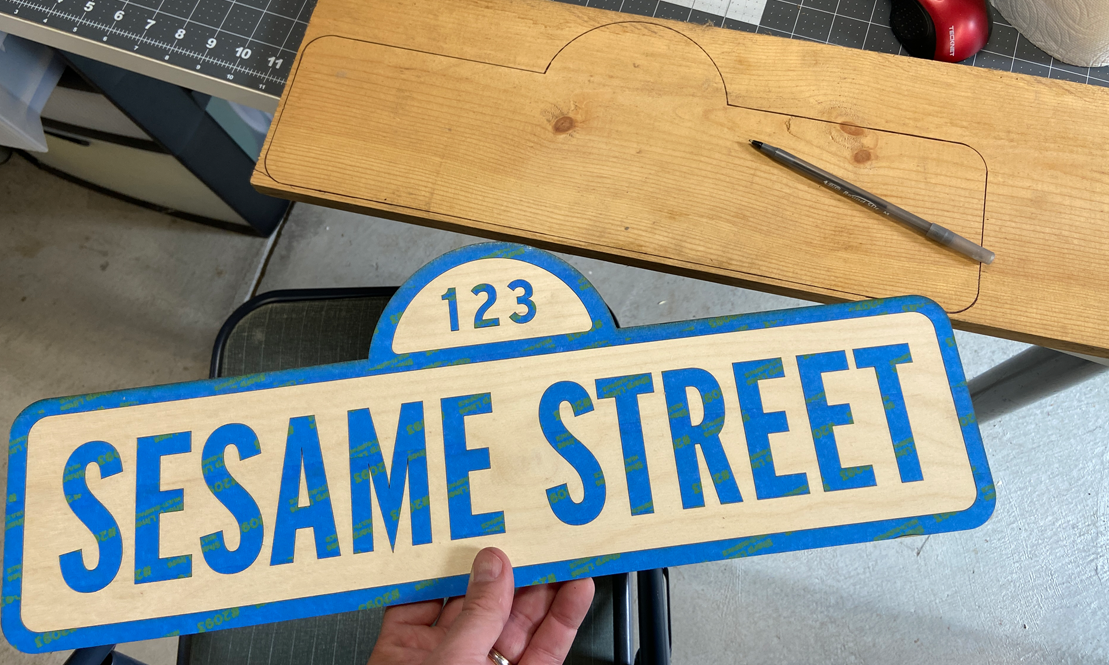
Part of this year’s Halloween house will show scenes from Sesame Street (Ernie and Bert’s apartment, Oscar the Grouch’s garbage can, etc.). Amidst this will be Sesame Street street sign with its bright green colored post, spherical light on the top, and the Sesame Street street sign.
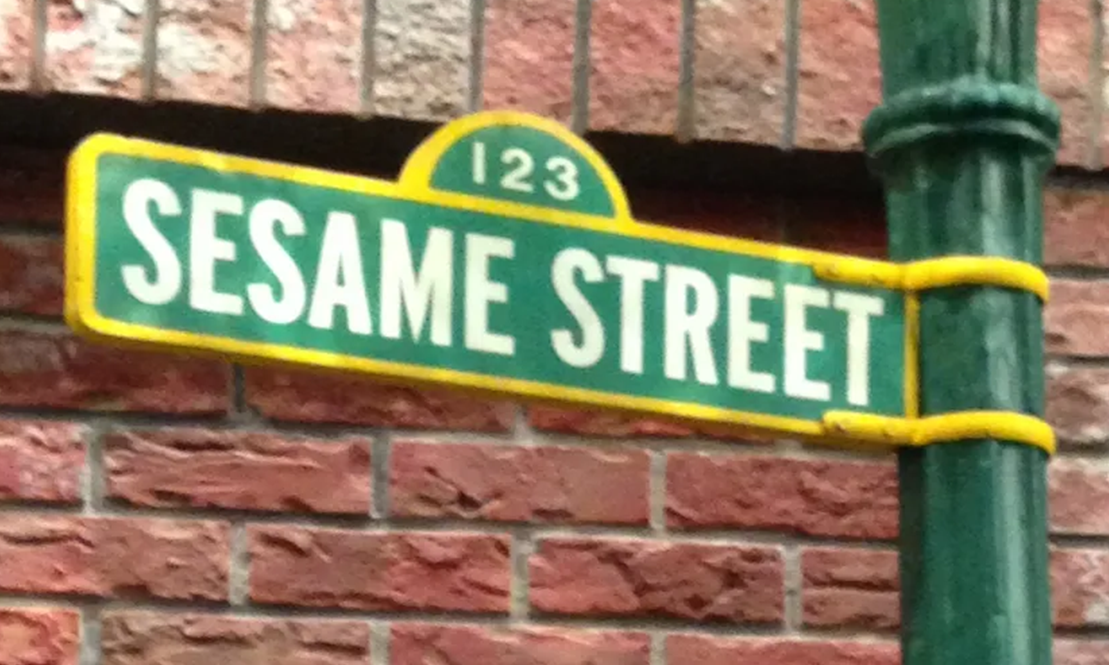
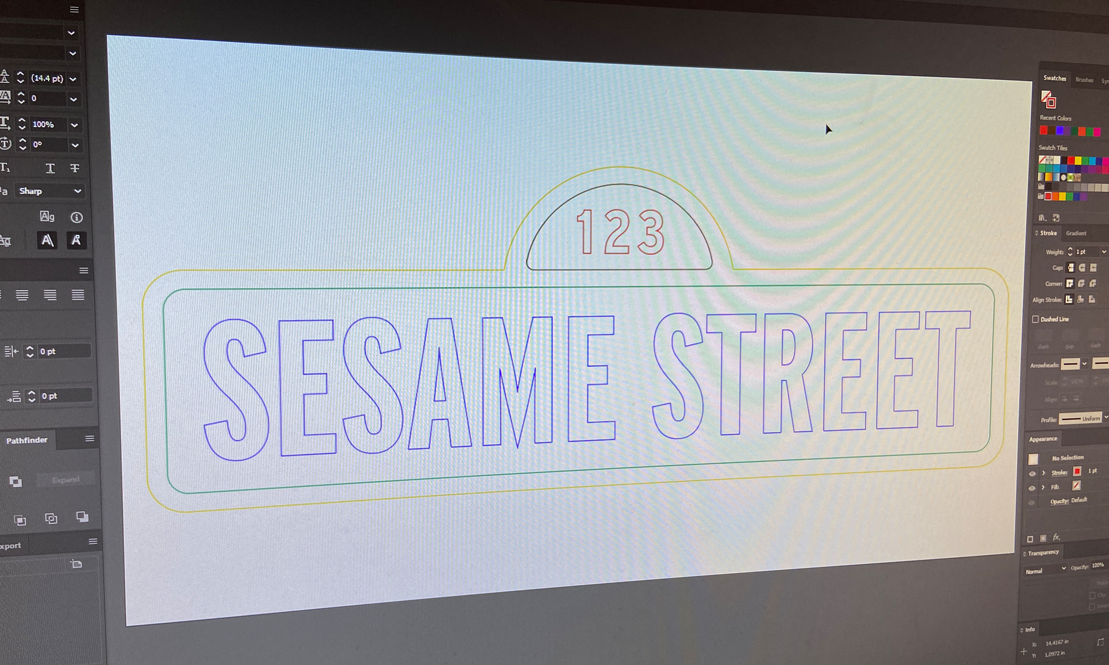
I decided to utilize the laser cutter to help me get an accurate version of the sign. Fortunately, on the Wikipedia site, they had an .svg file of the Sesame Street sign. An .svg file is a vector-based graphic which essentially has outlines for all the shapes for all the parts! Woo hoo! With this, I could take those outline vector shapes and have the laser cutter follow those lines as it cut the designs out of wood.
First I brought the file into Adobe Illustrator and adjusted them for the size I needed.
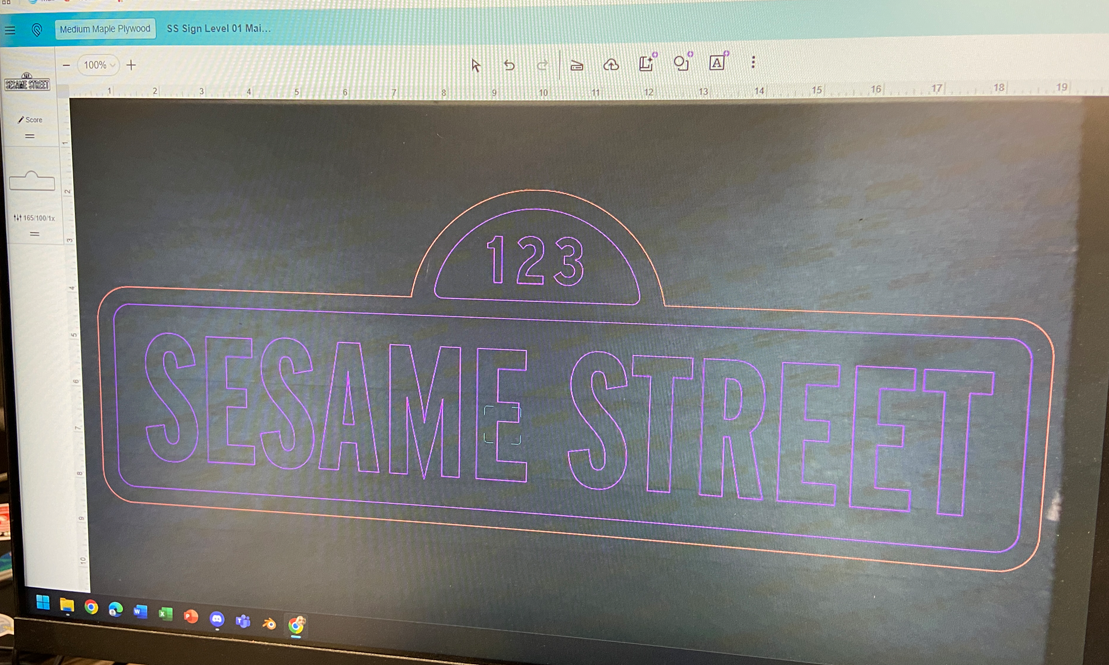
Next, I saved that file into a format for my laser cutter and brought it into the laser cutter software.
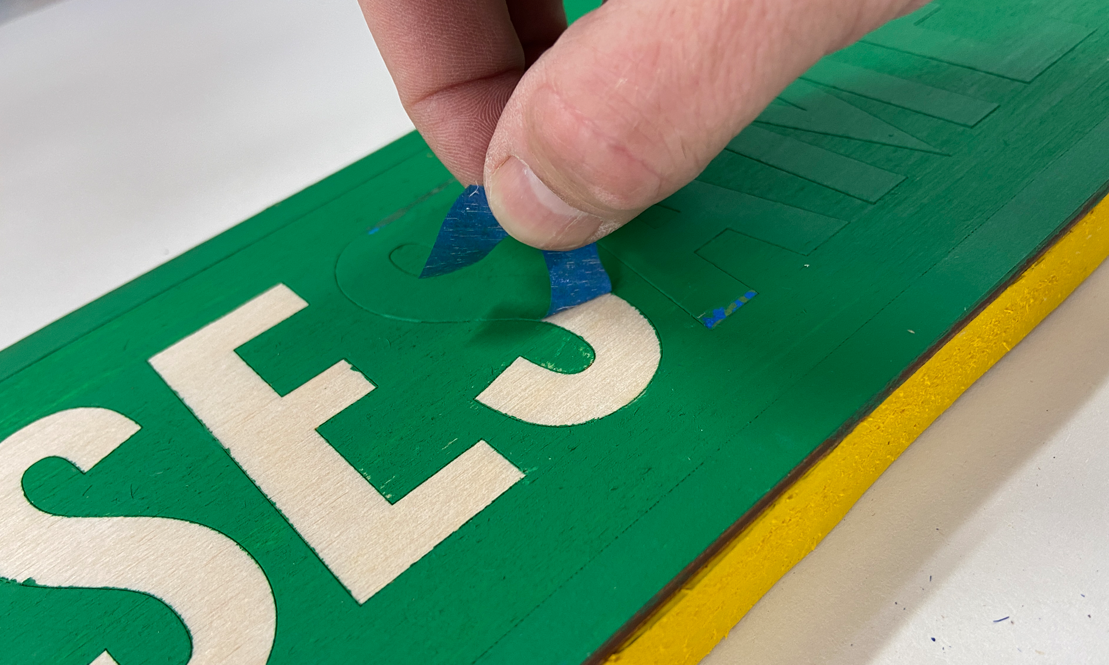
I put painters tape on the top of the 1/8 inch birch plywood so that I could have the laser cutter score (lightly cut just the top tape layer) part of the area to create a mask I would use later for painting. I also had the laser cutter cut out the outer path.
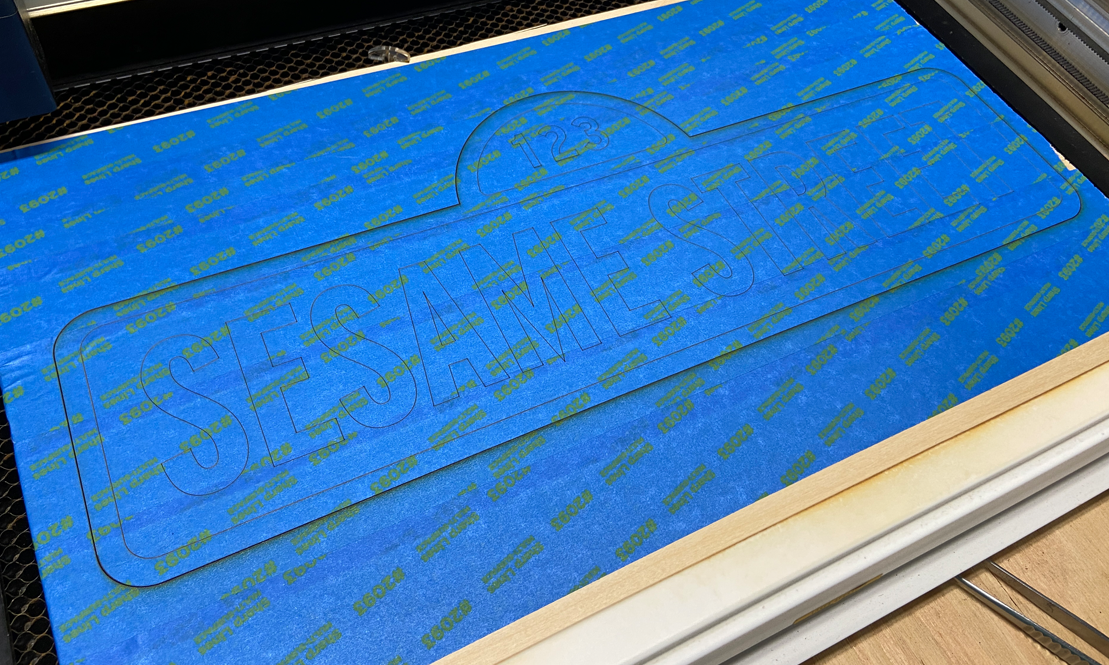
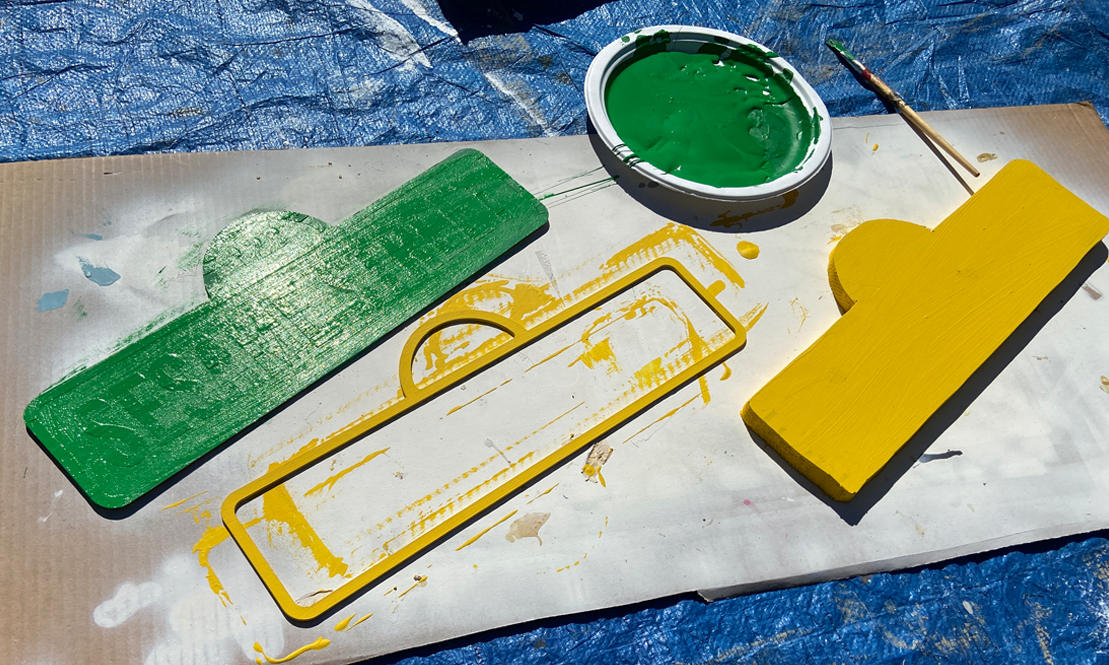
I removed a portion of the tape. I would paint the exposed region green, leaving the area under the letters, numbers and border unpainted so that I could glue letters, numbers and the border on top of those areas later.
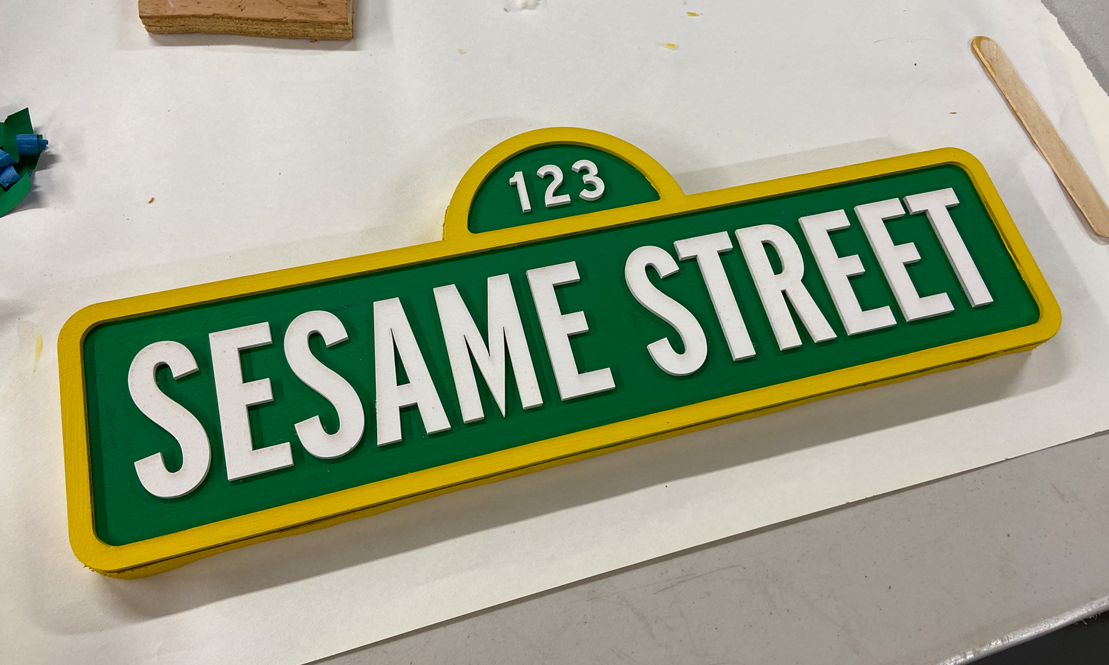
I then traced the outer shape of the sign onto a thicker piece of wood. I cut that out and use that as a stronger backing for the sign.
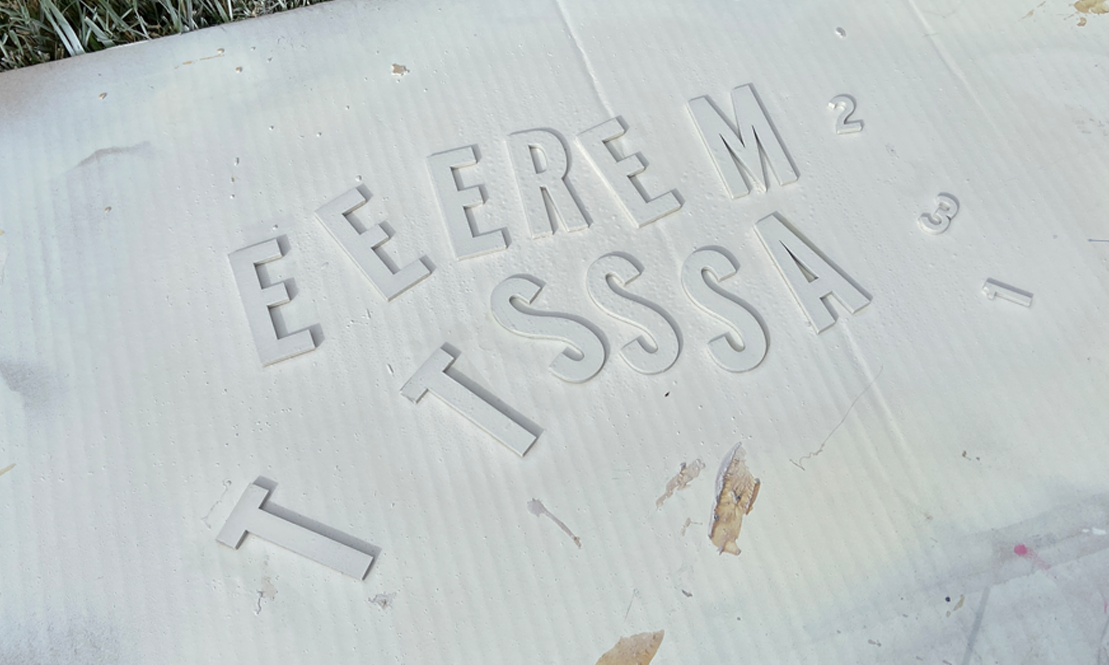
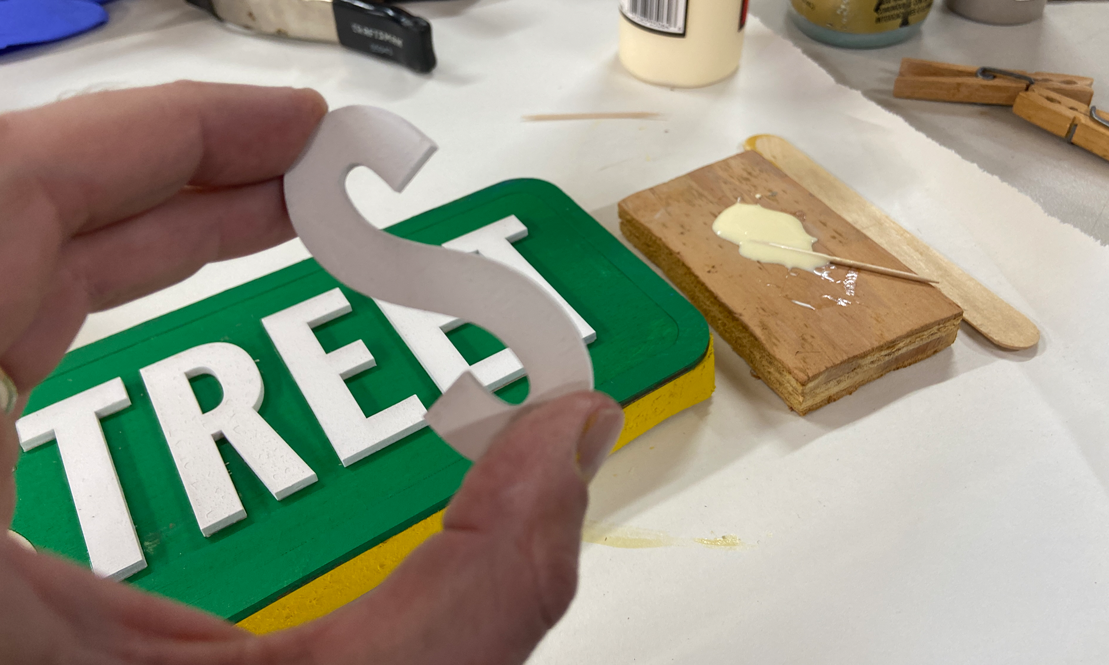
From a second sheet of 1/8 in. birch plywood, I cut all the letters, numbers and the border of the sign. I painted the letters with white spray paint and painted the rest with yellow and green paint.
I glued the thicker backing board to the middle piece of plywood…
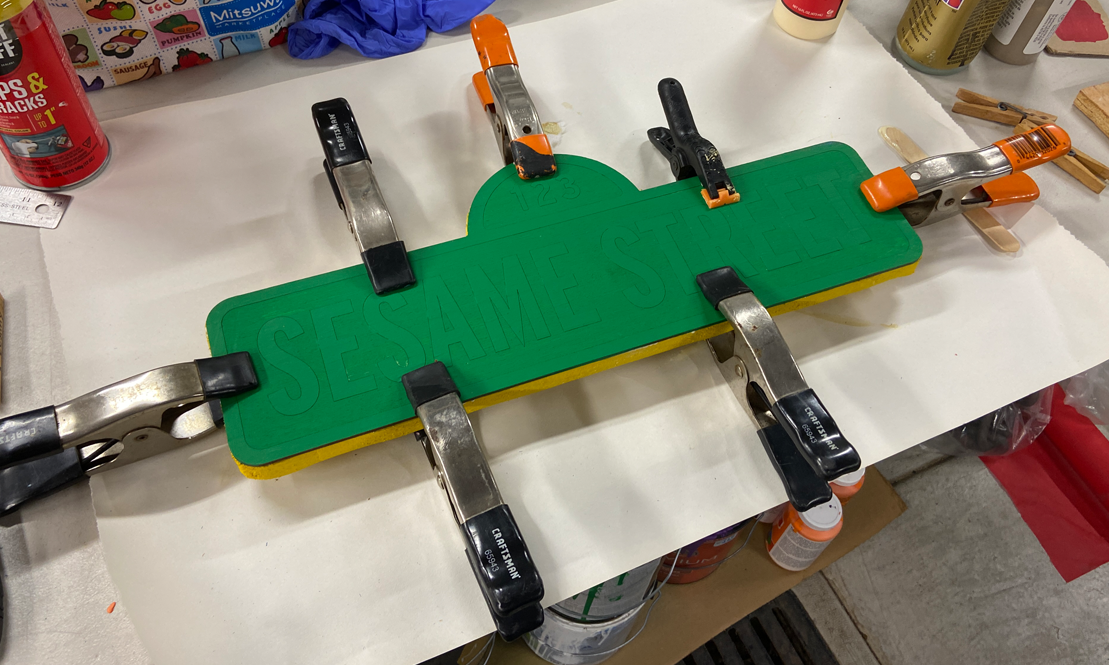
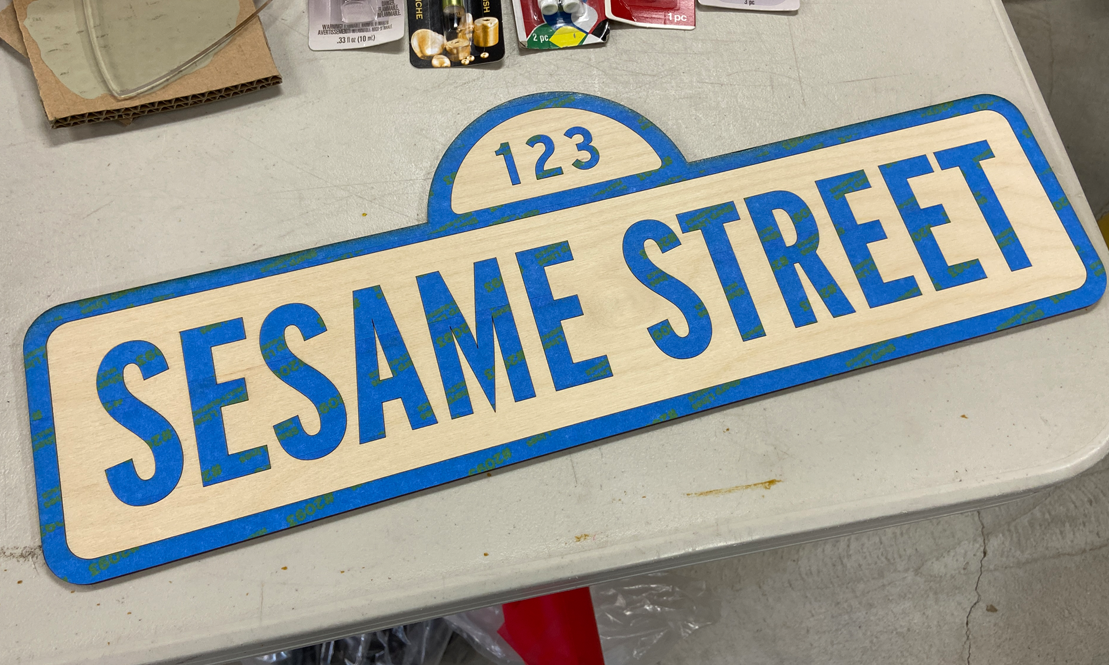
…and removed the painter’s tape, revealing unpainted areas where the letters, numbers and border would be glued (it is better to glue onto unpainted areas of wood).
I then glued the letters, numbers and border onto that layer of plywood.
And ended up with the complete Sesame Street sign!
For the light post, I used a thick cardboard tube that I got from Lowes. You can find them at other places as well, like Home Depot or other large hardware stores, typically in the section which sells AstroTurf by the roll. Often they have empty tubes sitting around that they are happy to give you. We painted ours green.

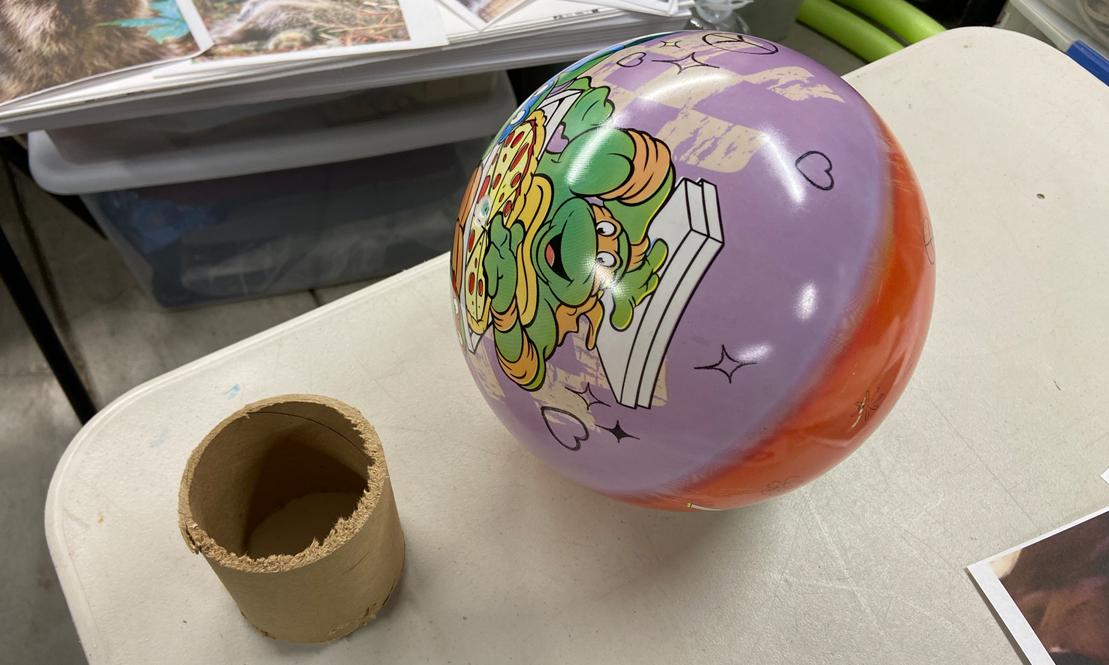
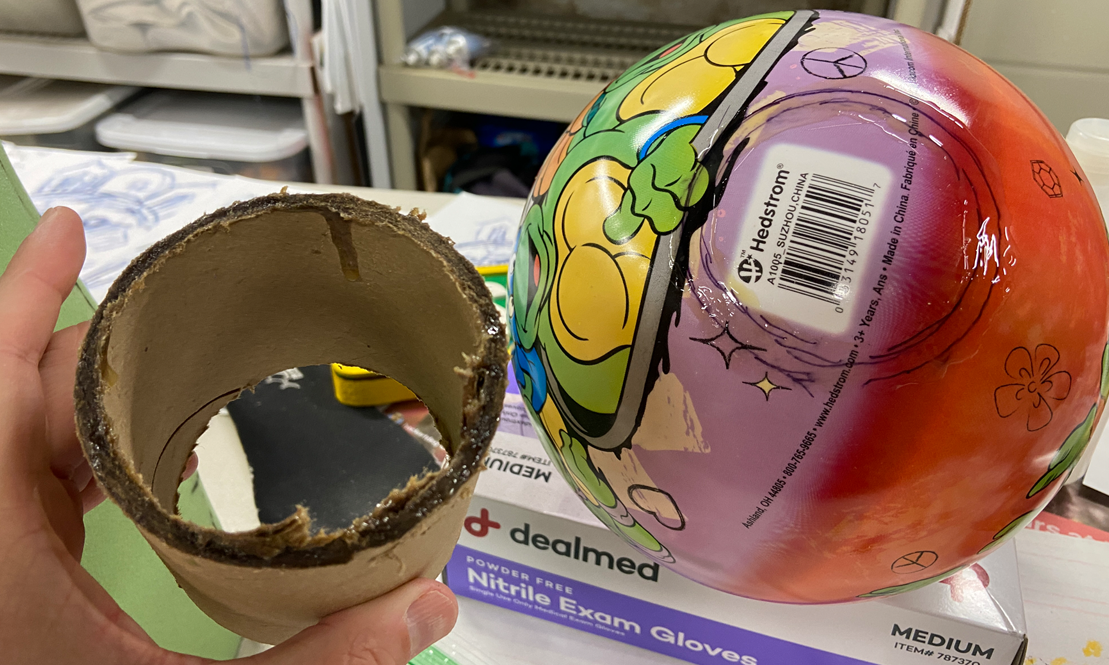
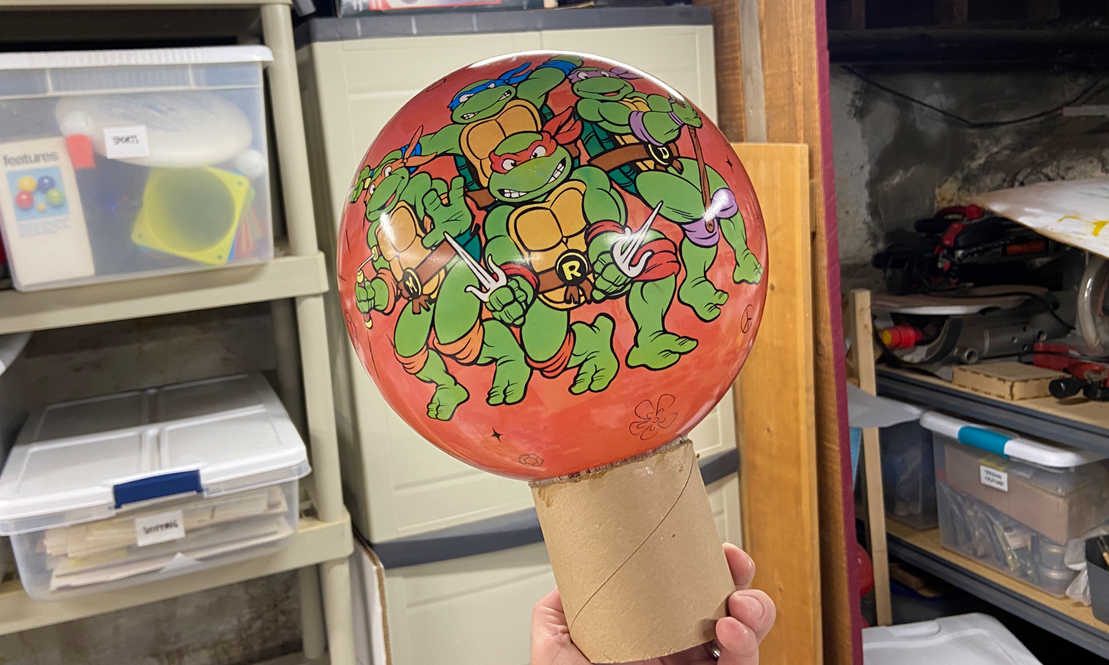
For the top spherical light globe, I bought a cheap kid’s (Teenage Mutant Ninja Turtle!) ball at Walmart for less than $5. I cut a piece of thick cardboard tube (smaller diameter than the larger light pole) and glued that onto the ball (I would later slip that part into the top of the pole to help hold the globe in place). I used contact cement, which it typically great for gluing almost anything to anything.
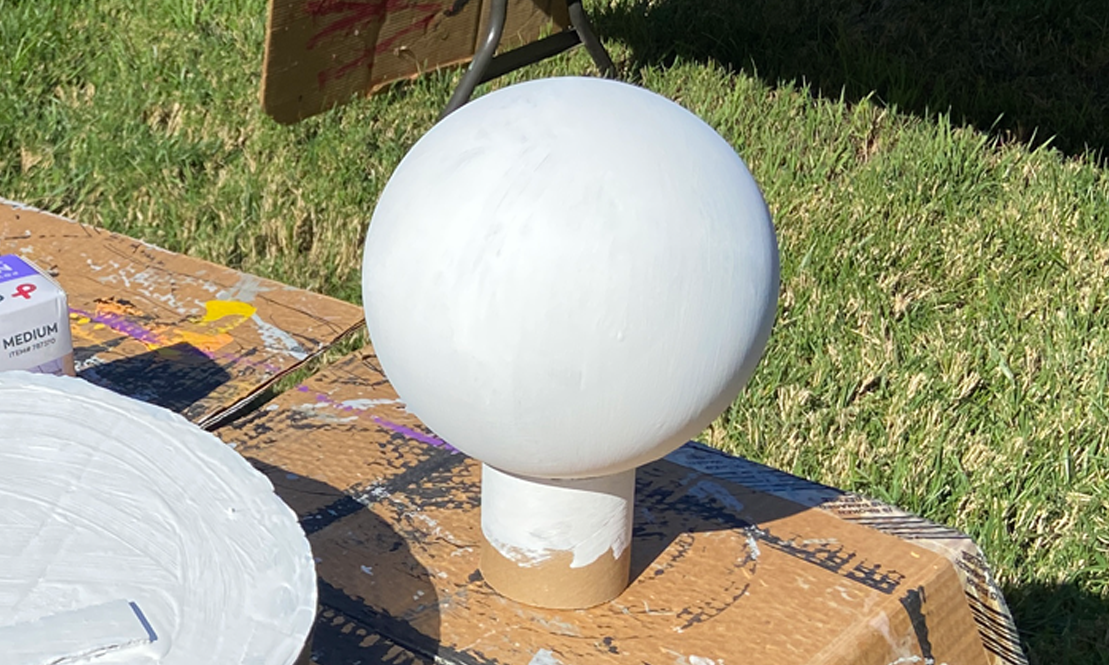
Then, we painted that white.
All that remains is to attach the Sesame Street street sign to the pole, put the globe on the top and put the whole thing in a green Christmas tree stand, and voila! Sesame Street Sign.